This sample scenario executes following process.
In this sample scenario, the following WinActor(OR-5200) modules are used.
* OR-5200 6.1 : 01_OR-5200_Control
The operation of this sample scenario was confirmed in the following environment.
The usage of this sample scenario is as follows.
Extracting the downloaded ZIP file and opening this sample scenario contained in the extracted folder.
Before executing this sample scenario, it is necessary to obtain the header name from the CSV file and register it as ”Variable Name" in "Valiable List".
By selecting a source CSV file from "Inport variable name" in the "Variable List", it is possible to capture the necessary header name into "Variable List".
*As for the details regarding "Import Variable Names", refer to WinActor operation manual **.
** OR-5200 6.1 : OR-5200 Operating Manual
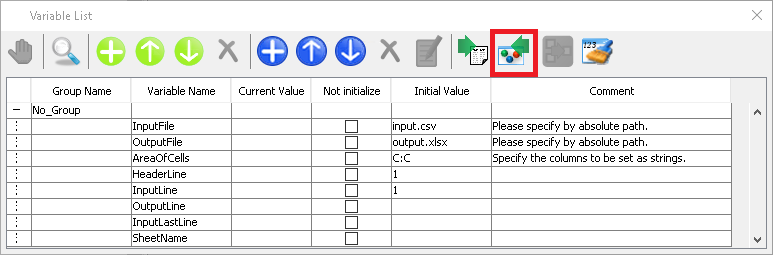
Executing "Inport variable name"
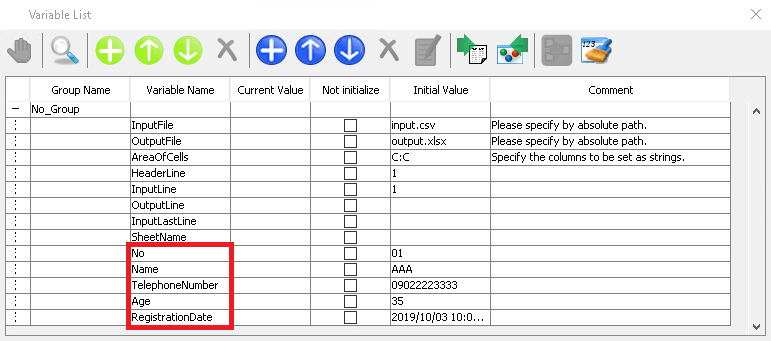 Result of "Import variable name"
After adding variable names, specify the "variable name" (i.e., column name) that has been added to "Column_A" to "Column_E" of "ExcelOperation_WriteRow".
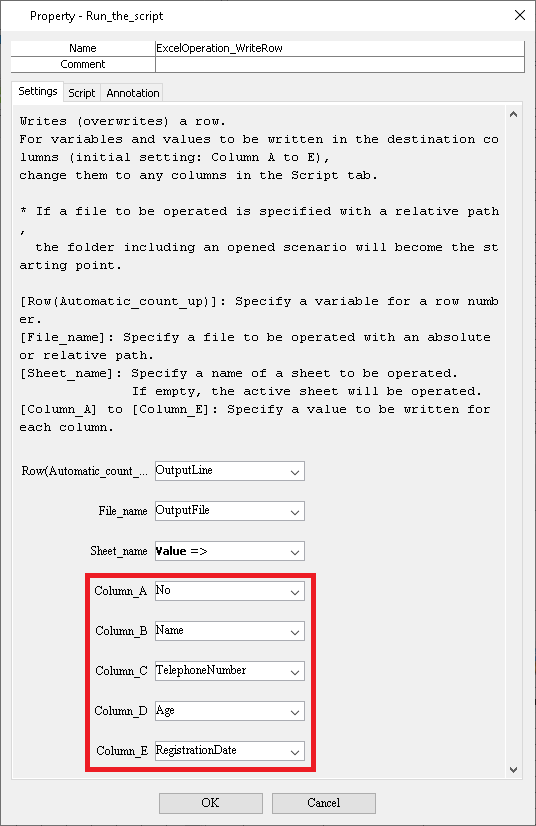
Setting up the variable name of "ExcelOperation_WriteRow"
The following variables need to be set in advance in order to execute this sample scenario.
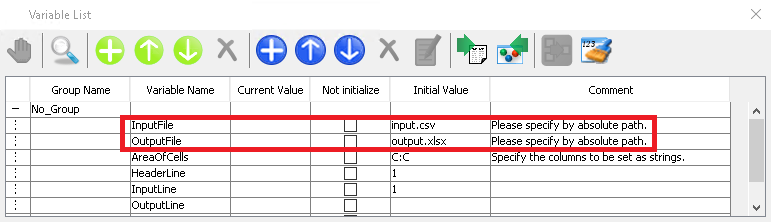
Variables needed to be set in advance
Specify the absolute path of the source CSV file.
E.g., C:\winactor\input.csv
Specify the absolute path of the output CSV file
E.g., C:\winactor\output.csv
In this sample scenario, there are variables prepared to change action. Although there are no problems if this sample scenario will be executed with default variable vaues. However, change the values of following variables when changing the clolumn to be set to string in the output Excel file.
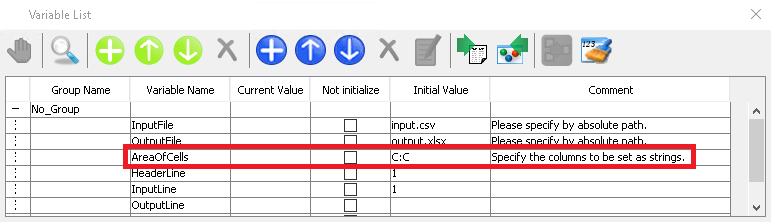
E.g., An example of columns to set string
Specify the area of columns to be set as strings in the output Excel file
E.g., C:C
Execute this sample scenario with WinActor (OR-5200). This sample scenario will be finished after getting values from a CSV file and copying them to an Excel file.
Cofirm if every data in a CSV file has been copied to an Excel file. Furthermore, check if the first "0" at the beginning of the data of No.1 A-san's telephone number in input.csv (i.e., check if the "0" is copied as string characters from the CSV file).
In this sample scenario, an error message will be displayed if a variable is specified incorrectly.
See the error message list for more information.
This section describes the implementation techniques used in this sample scenario.
When copying a block of cells in a CSV file and directly pasting it into an Excel file, the values in the cells may happen to be varied. E.g., the value "01230" in a CSV file will be changed to "1230" in an Excel file if Excel simply import the copied data.
Similarly, the value "2000/01/01 00:00:00" in a CSV file will be changed to "2000/1/1 0:00:00" * in an Excel file.
* It depends on the OS language and time zone settings.
The original valeu in a CSV file will be retained in a Excel file by setting the cell format as string characters. In this sample scenario, such operation is realized by setting the format of columns of concern as strring characters using "Excel_SetCellFormat" before copying to an Excel file.
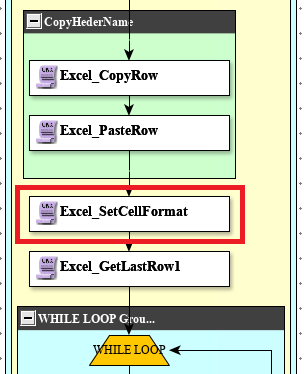
Nodes that change setting the format
In this sample scenario, although only the format of column C is set to string characters by specifying the area as "C: C" in "Excel_SetCellFormat", the formar setting as string characters can be efective over multiple colums by, e.g., specifying the area as "B: E" (accordinly, the format of column B through E wil be set as string characters).
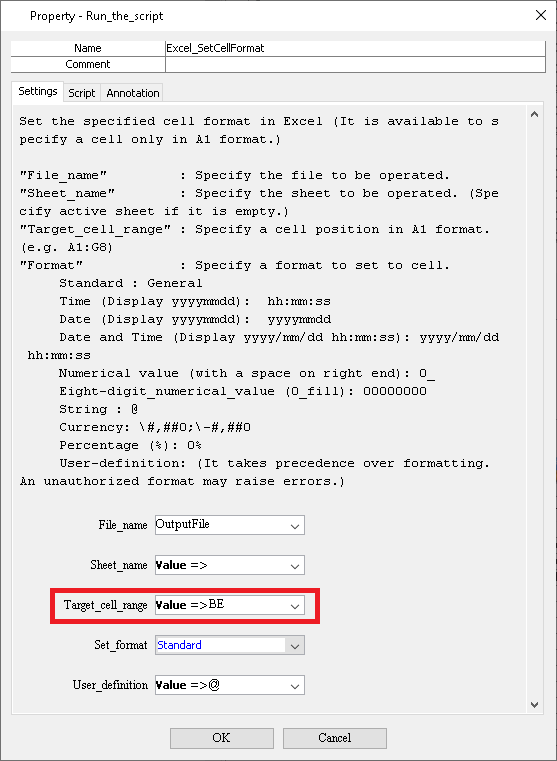
Formatting for multiple columns
When setting the format of column A and C as string characters while that of column B is to be retained, add "Excel_SetCellFormat" node and specify the setting as "A: A" for the first node and as "C: C" for the second node.
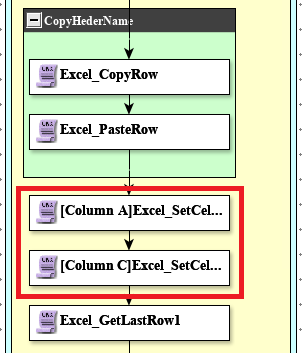
Formatting for multiple columns without column B
*In case a scenario is ccreated referring to this sample scenario, designated area of cells of concern of "Excel_SetCellFormat" may be wrong if the values fter copying are diferent from those before copying. Check if the setting for column of concern in the out put Excel file has been changed to string characters. If the format is not set to string characters, check the setting of "Excel_SetCellFormat".
As explained in Step 2. Importing variables, the column of the output Excel file is specified by "ExcelOperation_WriteRow". By changing this specification to the desired column only, you can paste only the values you need. In the following example, the value of the variable is pasted to columns A to C and columns D to E are set to blank.
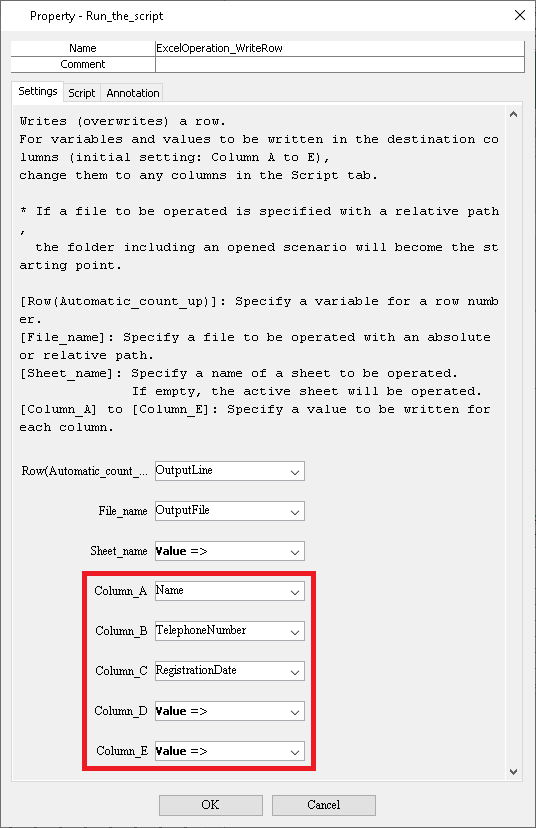
Example of changing the destination column
If you want to add columns F and beyond, please refer to the following to add your code from the Script tab. After adding the code, set the variable according to Step 2. Importing variables.
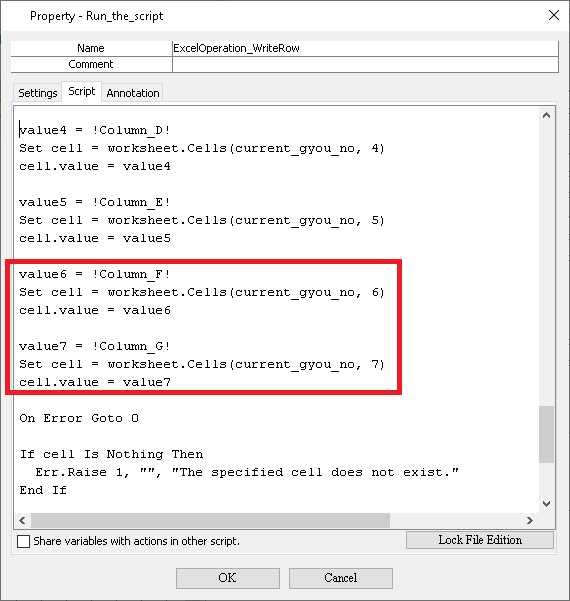
Example of adding the destination column
| Version | Date | Details |
|---|---|---|
| 1.0 | 10/27/2020 | First edition |